Getting Started
You will need a valid email to confirm your account and successfully register
1. Sign up
1.1 Navigate to Arkhia.io.
1.2 Click on Sign In and select Create Account.
1.3 Enter your Email and a Password and agree on Arkhia's Terms of Service to proceed.
After signing up you should receive a success message and be redirected to the Arkhia dashboard
2. Account Confirmation
Make sure the email is from noreply@arkhia.io.
If the email sender does not match, please do not click the email and notify Arkhia here.
2.1 After signing in, check your Inbox for a Confirmation Email.
2.2 Click on CONFIRM YOUR ACCOUNT to activate your account.
2.3 Verify that you have been redirected to Arkhia.io and a confirmation page was shown.
If you have not received a confirmation email please please return to the Welcome page on the dashboard and click on the top orange banner with the message Click here to resend a confirmation email
3. Dashboard (first look)
The Dashboard is your control station for Arkhia's Services
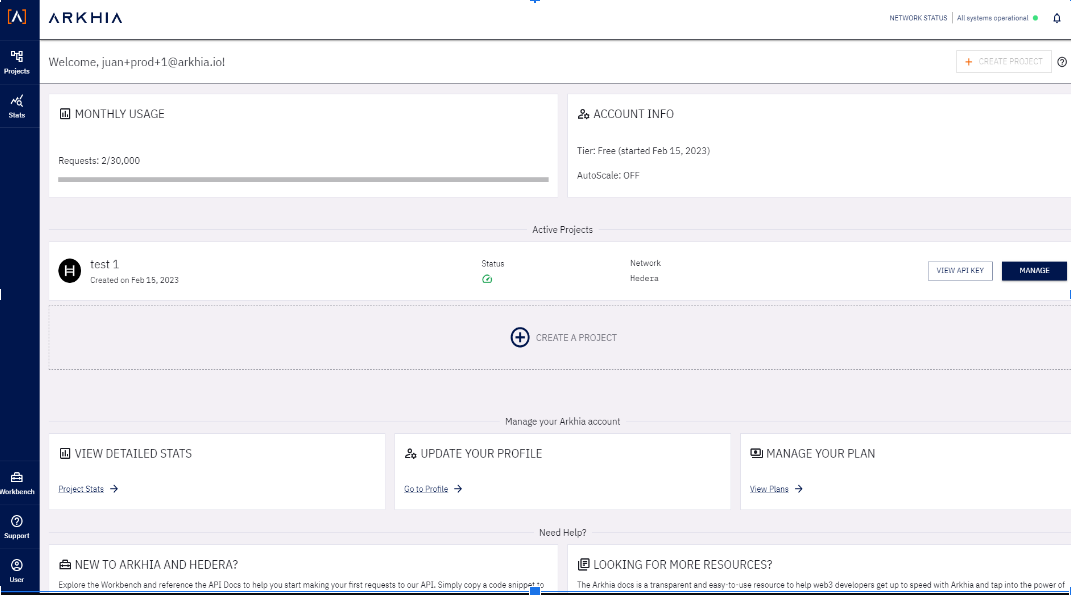
3.1 Create Projects and access your API Keys.
3.2 Understand your projects Stats and check the Network Health.
3.3 Navigate Arkhia APIs and response datasets with Workbench.
3.4 Update your profile and login info in Settings.
3.5 Manage your Subscription Plan.
3.6 Access Arkhia Docs for easy-to-use documentation.
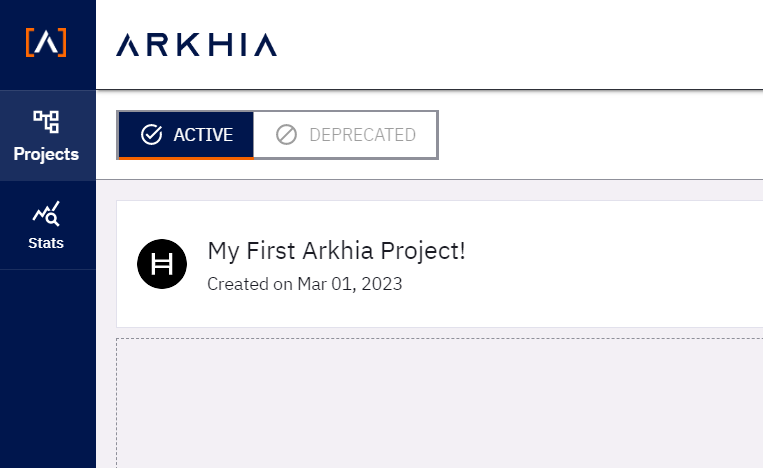
4. Create Your First Project
In order to tap into Arkhia’s infrastructure, you will need to create your first Project.
4.1 Click on GET STARTED to begin.
4.2 Fill in your project details::
- Project Name
- Description (Optional)
- Protocol

4.3 Verify that your project has been created.
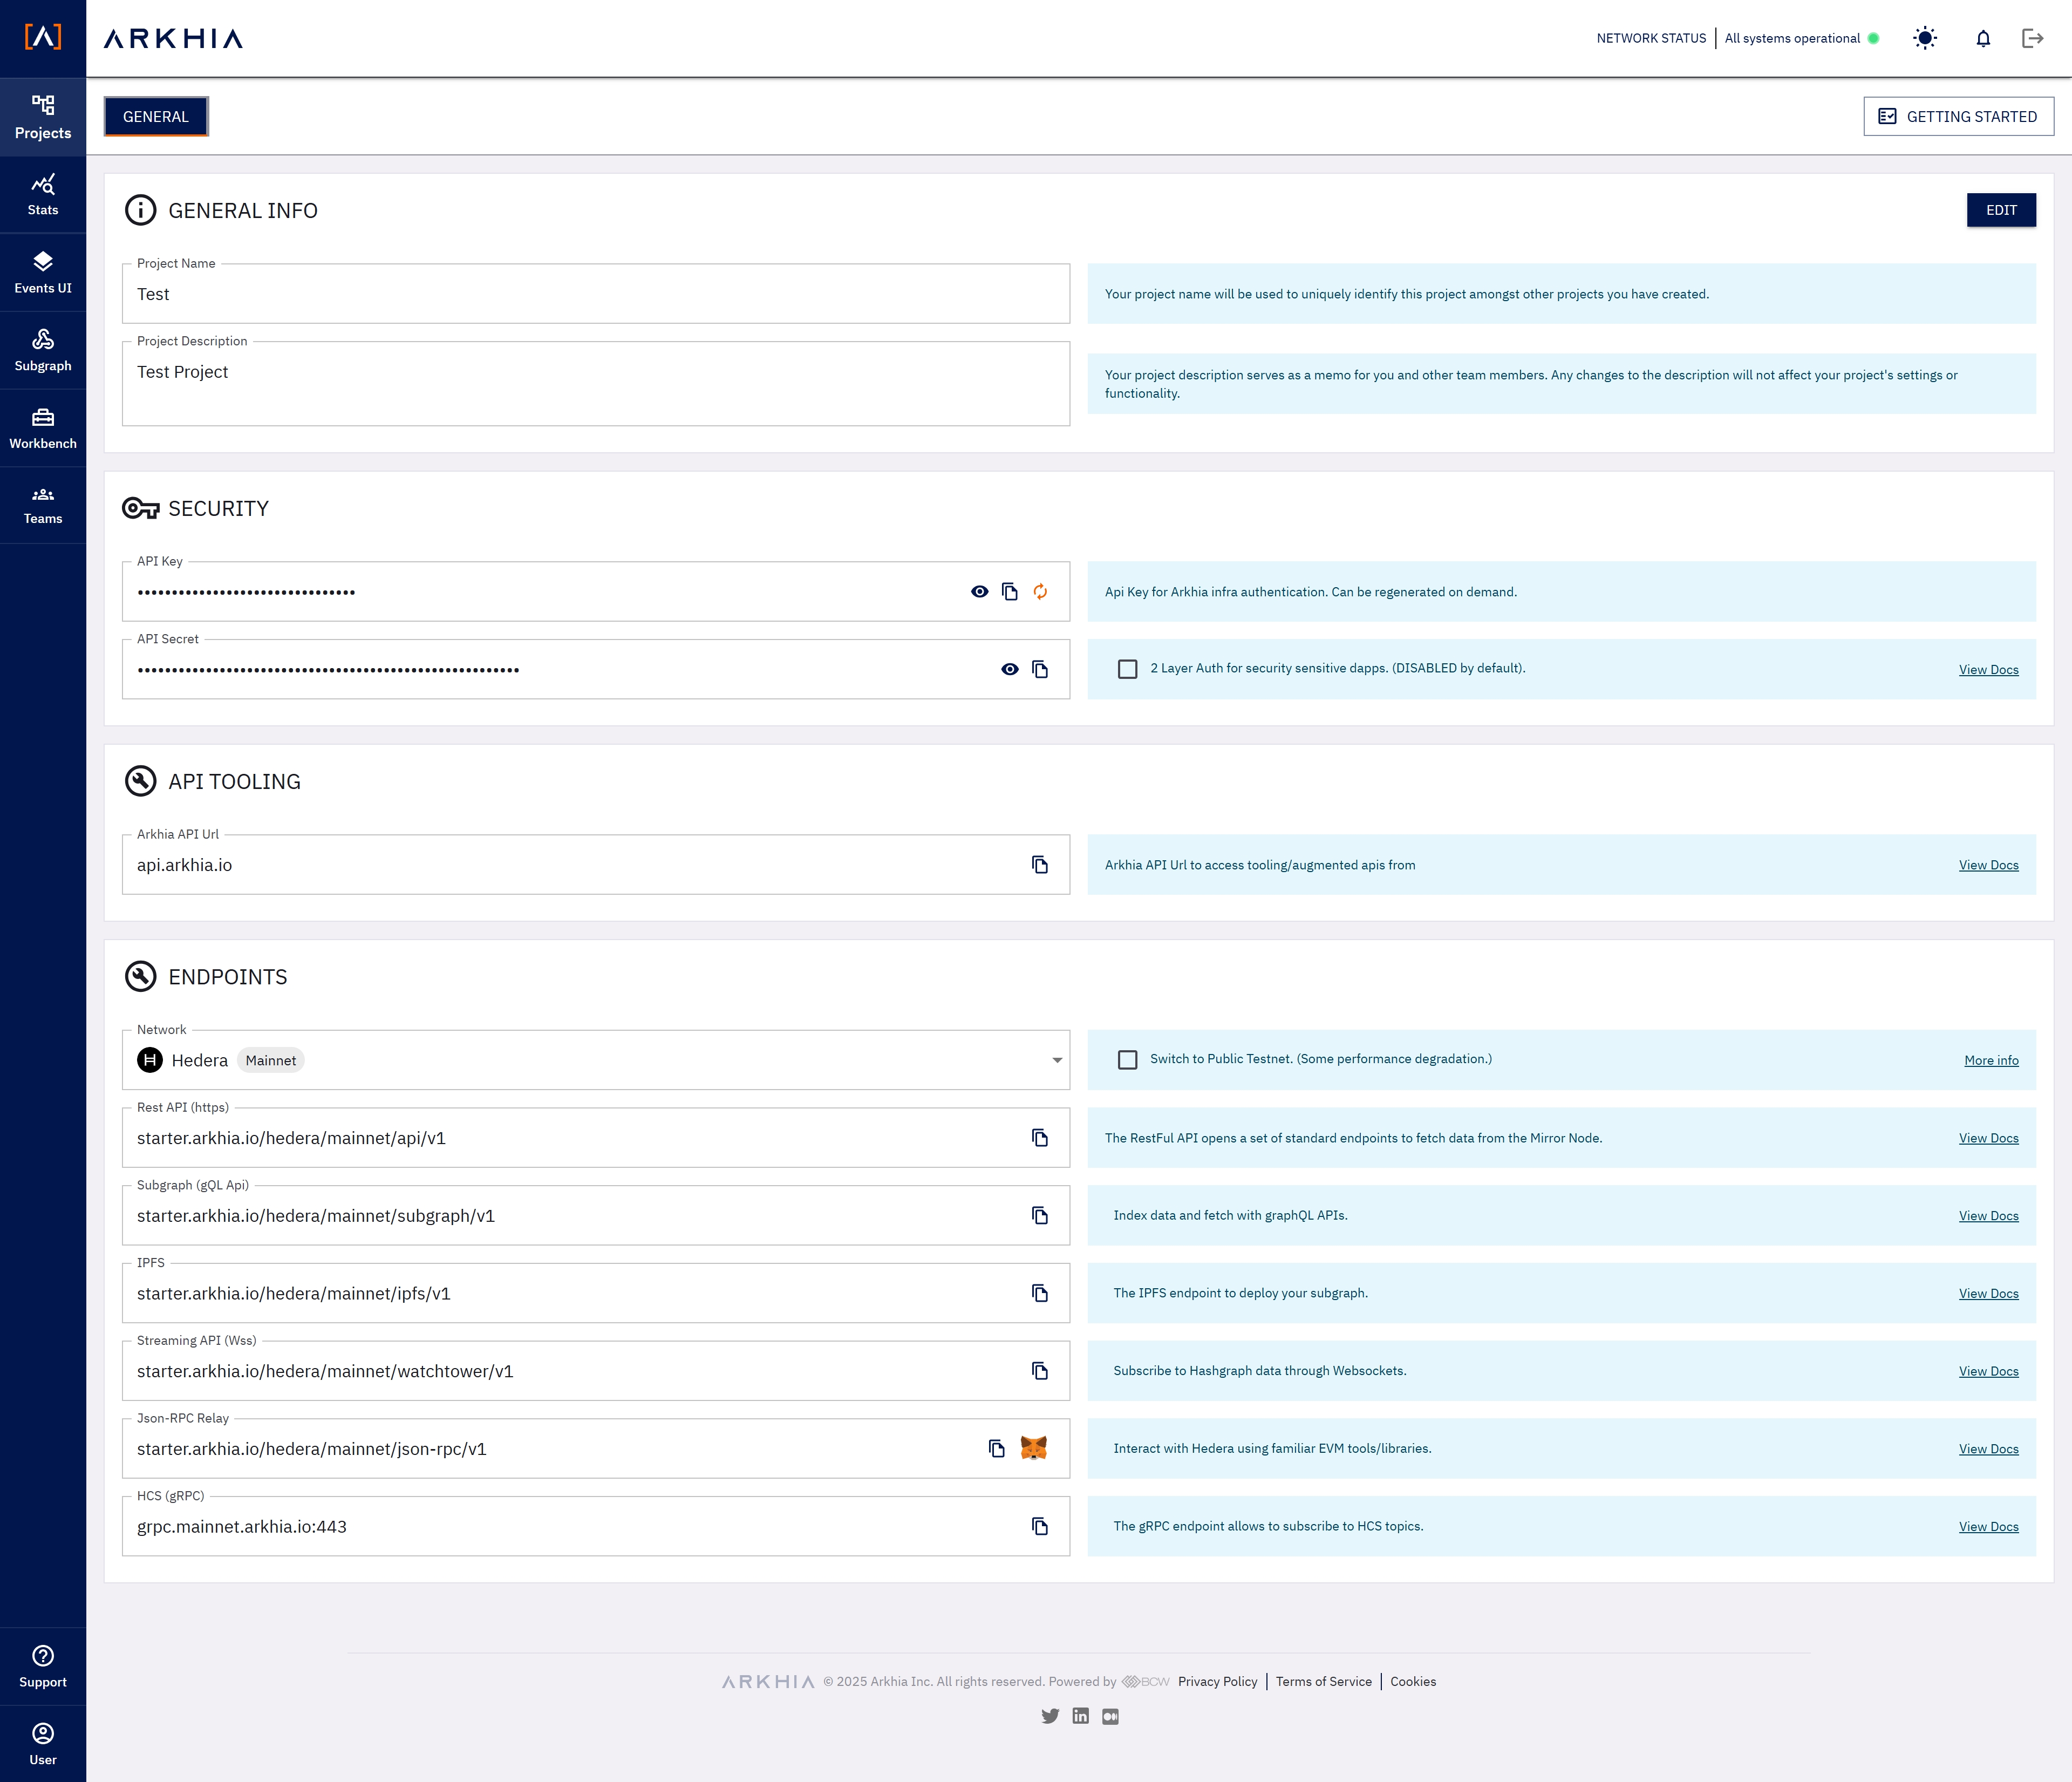
4.4 Manage your Project Details, generate your API Key, and find Arkhia’s Endpoints.
The API Key field is the gateway into our infrastructure through your account. Keep it safe and private at all times and share it consciously.
The number of projects you can create is defined by the Subscription tier you have signed up for.
General Info: Manage the name and details of your project by clicking the EDIT button.
Security: access the API Key generated for your project, this is the Key component of your account as it enables you to tap into Arkhia's services.
Services: endpoints to Arkhia’s reliable, scalable and highly-available services.
REST: your Hedera Dapps can plug in following a REST API Protocol (Mainnet/Testnet/ Previewnet available).
GraphQL: take maximum advantage of GraphQL features to reach Arkhia mirror node.
Watchtower: Arkhia's premium streaming service that allows end users to subscribe to data streaming from the Mirror Node.
Json-RPC Relay: available to use Ethereum tools to connect with the Hedera Ecosystem.
gRPC: subscription channel to HCS topics.
Request Test
Is this thing on? Let's find out!
For this step, you need to already have an active account and a project created.
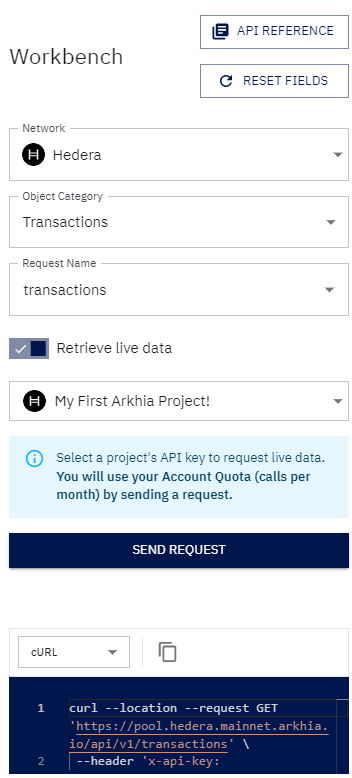
Arkhia's Workbench can generate ready to use Requests on
- cURL
- Go - Native
- Javascript - Fetch
- Node.JS - Axios
- Node.JS - Native
- Node.JS - Request
- Python - http.client
- Python - Requests
Make live calls with Arkhia's Workbench
1. Click on Getting Started at the top right of the Projects Details page to access Arkhia’s workbench.
2. Select the network, object category and request.
3. Send a Live Request.
Find below examples from different channels/platforms
- cURL
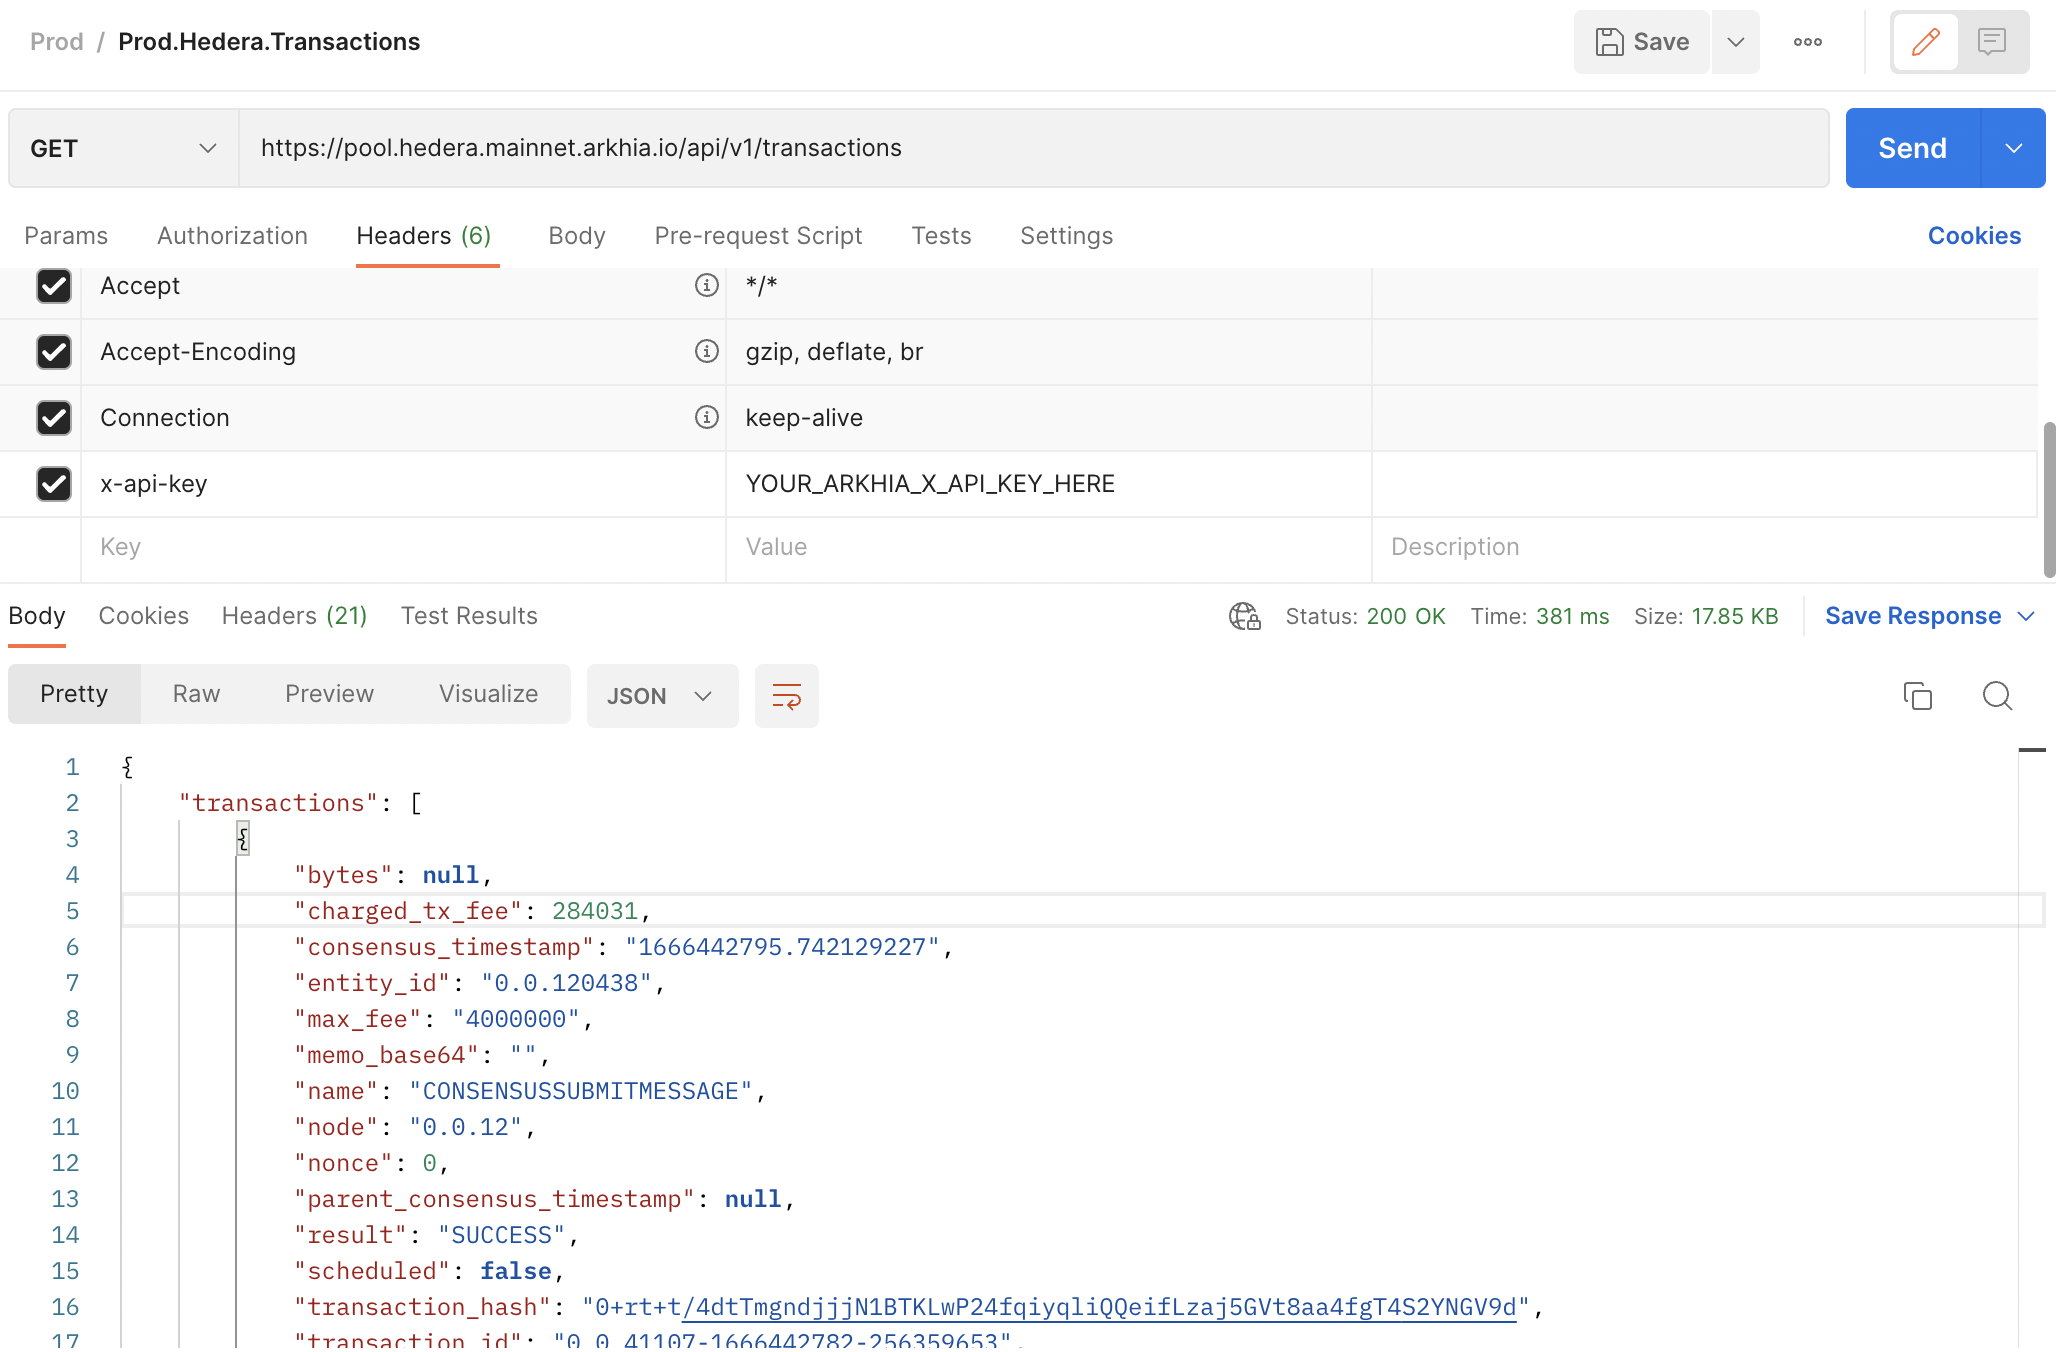
- Postman
- Javascript
- Node.js (Axios)
- Python
- R
For more info on cURL commands click here.
For more info on how to use the Terminal click here.
1. Open a terminal on your favorite OS.
2. Copy the cURL command from the workbench and press ENTER
curl --location --request GET '<REST_API_FREE_URL_HERE>/transactions' \--header 'x-api-key: {YOUR_API_KEY_HERE}'3. If you have a similar output that the picture below then
Data is flowing down from the Arkhia Mirror node to your client
You've made a successful request with Arkhia! 🎯

// WARNING: For GET requests, body is set to null by browsers.var xhr = new XMLHttpRequest();xhr.withCredentials = true;xhr.addEventListener("readystatechange", function() { if(this.readyState === 4) { console.log(this.responseText); }});xhr.open("GET", "https://pool.arkhia.io/hedera/mainnet/api/v1/transactions");xhr.setRequestHeader("x-api-key", "YOUR_ARKHIA_X_API_KEY_HERE");xhr.send();var axios = require('axios');var config = { method: 'get', url: 'https://pool.arkhia.io/hedera/mainnet/api/v1/transactions', headers: { 'x-api-key': 'YOUR_ARKHIA_X_API_KEY_HERE' }};axios(config).then(function (response) { console.log(JSON.stringify(response.data));}).catch(function (error) { console.log(error);});import http.clientconn = http.client.HTTPSConnection("pool.arkhia.io/hedera/mainnet")payload = ''headers = { 'x-api-key': 'YOUR_ARKHIA_X_API_KEY_HERE'}conn.request("GET", "/api/v1/transactions", payload, headers)res = conn.getresponse()data = res.read()print(data.decode("utf-8"))library(RCurl)headers = c( "x-api-key" = "YOUR_ARKHIA_X_API_KEY_HERE")res <- getURL("https://pool.arkhia.io/hedera/mainnet/api/v1/transactions", .opts=list(httpheader = headers, followlocation = TRUE))cat(res)What's next ?
Getting started gets you running by making a request to our REST-API. Learn more about everything you can do with Arkhia in our